
Introduction: Maintenance and Troubleshooting
- How to fix a Philips electric shaver at home is a technical task that requires procedural precision and a systematic approach to hardware diagnostics.
- When the grooming hardware encounters performance degradation, such as motor stagnation or diminished cutting precision, understanding the internal mechanism is vital. Many mechanical and electrical malfunctions—particularly within the Philips Norelco Series 7000 and 9000 architectures—are often resolved through diagnostics rather than immediate hardware replacement.
- This methodology maximizes operational lifespan while mitigating the environmental impact of electronic waste.
Note: Standard maintenance is classified as entry-level (1/5 difficulty). Internal diagnostics—such as motor inspection and PCB testing—demand advanced technical precision (5/5) and should be approached only after primary troubleshooting fails.
Quick Summary
The following quick summary provides an easy-to-follow overview on how to fix a Philips electric shaver at home. This guide highlights the essential steps, from disconnecting power and preparing tools to cleaning, inspecting internal connectivity, and performing battery calibration. Whether you are a DIY enthusiast or looking to maintain your shaver efficiently, this quick summary ensures you can restore performance safely and effectively without missing critical procedures.
| Step | Action | Key Tip |
|---|---|---|
| 1 | Disconnect Power | Always isolate the shaver from any charging source before opening. |
| 2 | Tools Setup | Prepare precision screwdrivers, tweezers, cleaning brush, and microfiber cloth. |
| 3 | Clean Cutting Assembly | Detach foil and blade blocks; soak in mild detergent; ensure 24-hour drying. |
| 4 | Inspect Internal Connectivity | Check wires, battery terminals, and PCB solder joints; solder if needed. |
| 5 | Battery Calibration | Fully discharge, then charge 8–12 hours to recalibrate battery sensors. |
| 6 | Lubrication & Maintenance | Apply shaver oil monthly and dry brush after every 2–3 uses. |
| 7 | Test & Reassemble | Ensure smooth operation and proper fit of all components before use. |
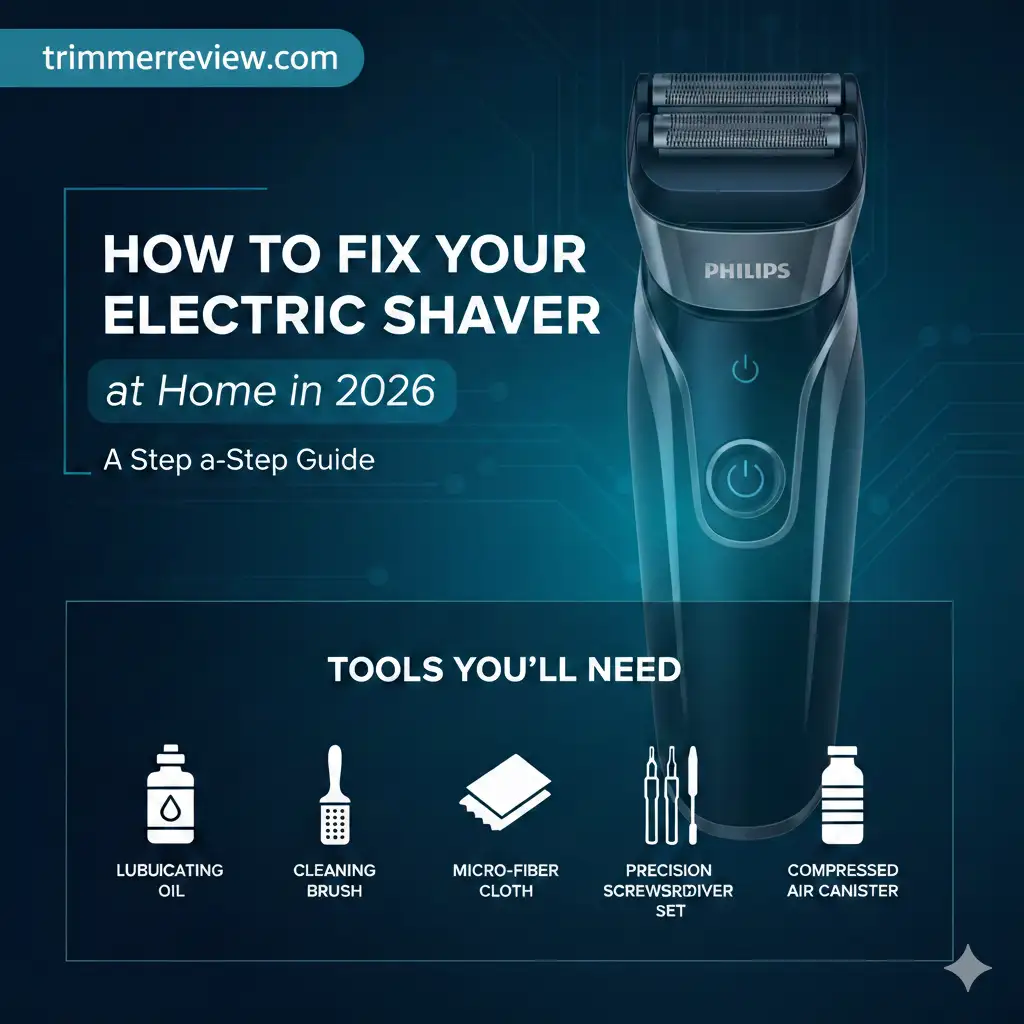
Tools Required
Successful maintenance begins with staging the correct tools to ensure a precise, non-destructive repair process. Establishing a structured workspace minimizes the risk of damaging delicate fasteners and internal components during disassembly:
- Precision Screwdriver Set: Required to access the internal housing without stripping fastener heads.
- Cleaning Brush: A soft-bristled brush or fine-tipped tool is ideal for clearing debris from sensitive electronic assemblies.
- Isopropyl Alcohol (70% or higher): Used to sanitize the shaving unit and dissolve accumulated, viscous residue.
- Shaver Lubricating Oil: Essential for maintaining motor performance by reducing friction and heat.
- Tweezers: Necessary for the careful extraction of debris trapped within the motor shaft or drive mechanism.
- Microfiber Cloth: Facilitates a lint-free finish for the device casing and chassis components.
Pro-Tip: While manual brushes are effective for surface cleaning, incorporating a compressed air canister provides the necessary pressure to displace microscopic hair fragments from the motor shaft and internal drive housing.
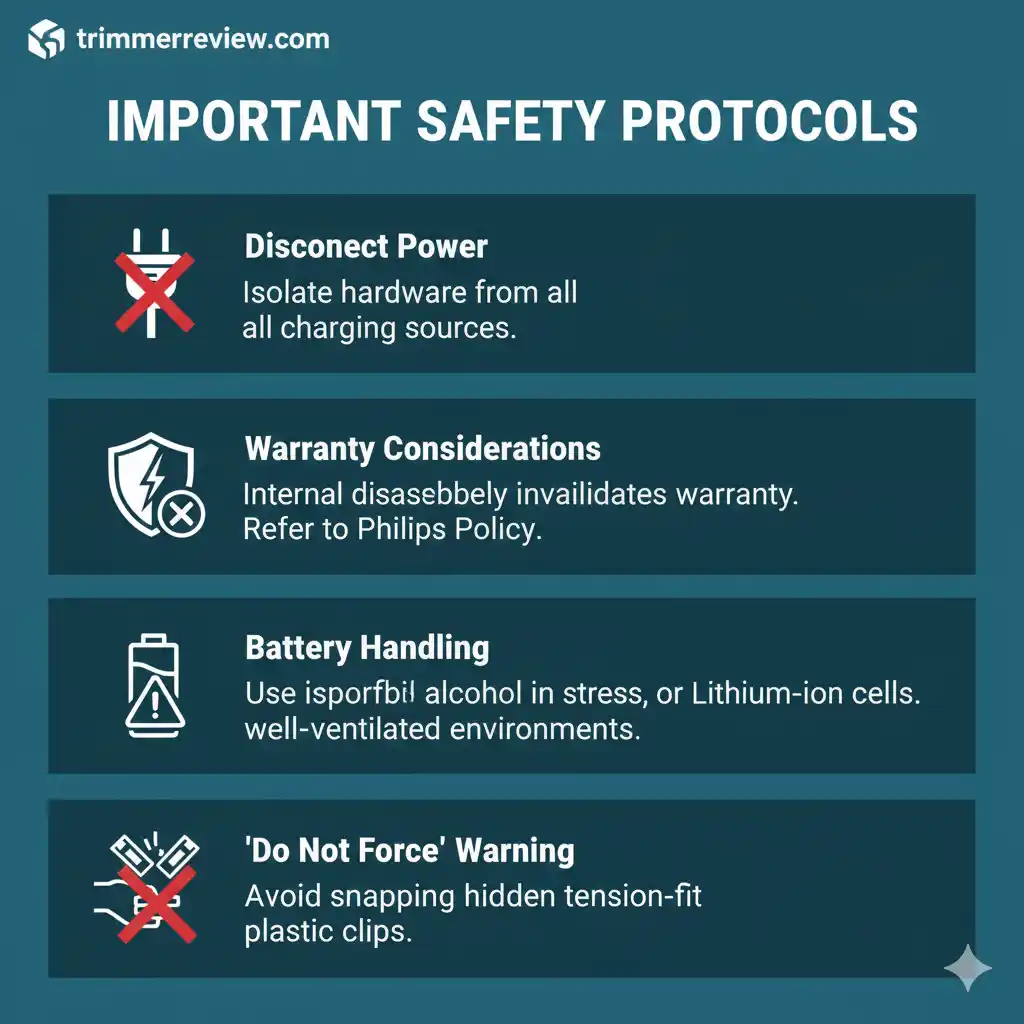
Important Safety Protocols
Strict adherence to established diagnostic protocols protects the integrity of the device and ensures long-term operational viability. Following these safety measures is essential when mastering how to fix a Philips electric shaver at home, as improper handling during disassembly can lead to irreparable damage to delicate internal sensors and power management components.
- Disconnect Power: Isolate the hardware from all charging sources prior to initiating maintenance.
- Warranty Considerations: Internal disassembly frequently invalidates manufacturer warranties. Refer to Philips Warranty Policy for specific coverage details.
- Battery Handling: Lithium-ion cells require careful handling; never puncture, stress, or physically deform these components.
- Chemical Ventilation: Utilize cleaning solvents—specifically isopropyl alcohol—exclusively in well-ventilated environments.
- “Do Not Force” Warning: Many internal components are secured via hidden tension-fit plastic clips. Attempting to pry these sections apart with excessive pressure frequently causes the structural snapping of mounting tabs.
Quick Troubleshooting Table
Utilizing a diagnostic matrix serves as an essential reference for those learning how to fix Philips electric shaver at home, as it allows for the swift identification of mechanical and electrical faults. Correlating specific operational symptoms with their probable causes streamlines the repair workflow and reduces unnecessary hardware inspection.
| Symptom | Likely Cause | Suggested Action |
|---|---|---|
| No Power | Charging port obstruction | Clear port using a dry, non-conductive precision brush |
| Pulling Hair | Blade degradation or insufficient lubrication | Replace cutting elements or apply high-grade shaver oil |
| Sluggish Motor | Internal debris accumulation | Perform a comprehensive cleaning of the motor drive shaft |
| Overheating | Excessive internal friction/clogging | Clean/lubricate; allow 30 min for thermal dissipation |
For detailed model-specific diagrams and warranty information, refer to the Philips Official Support Page.
Advanced Repair Steps: How to Fix a Philips Electric Shaver at Home
When standard maintenance protocols fail to restore performance, advanced diagnostic procedures become necessary. The following steps are applicable to most rotary architectures, including the Norelco Series 5000 and 7000 platforms. These procedures are designed to isolate specific points of failure within the power transmission system and motor assembly.
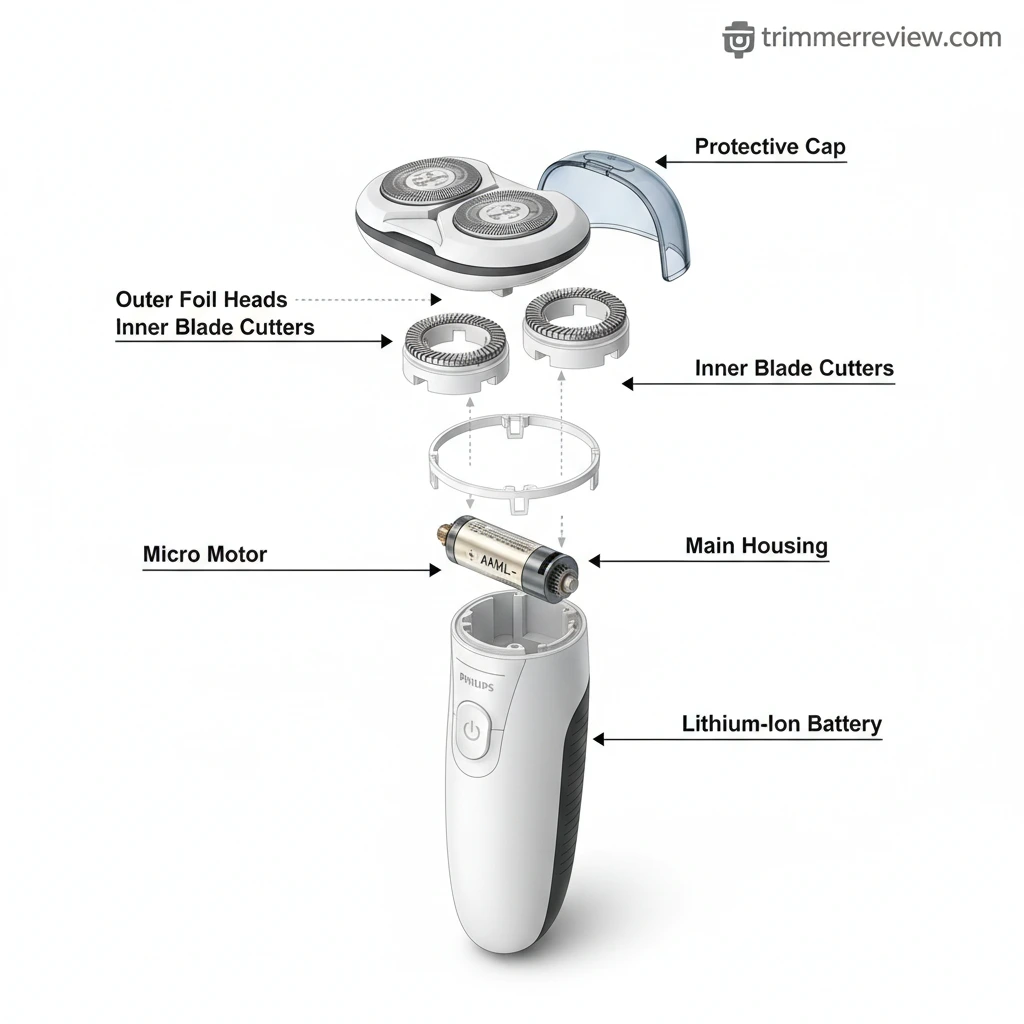
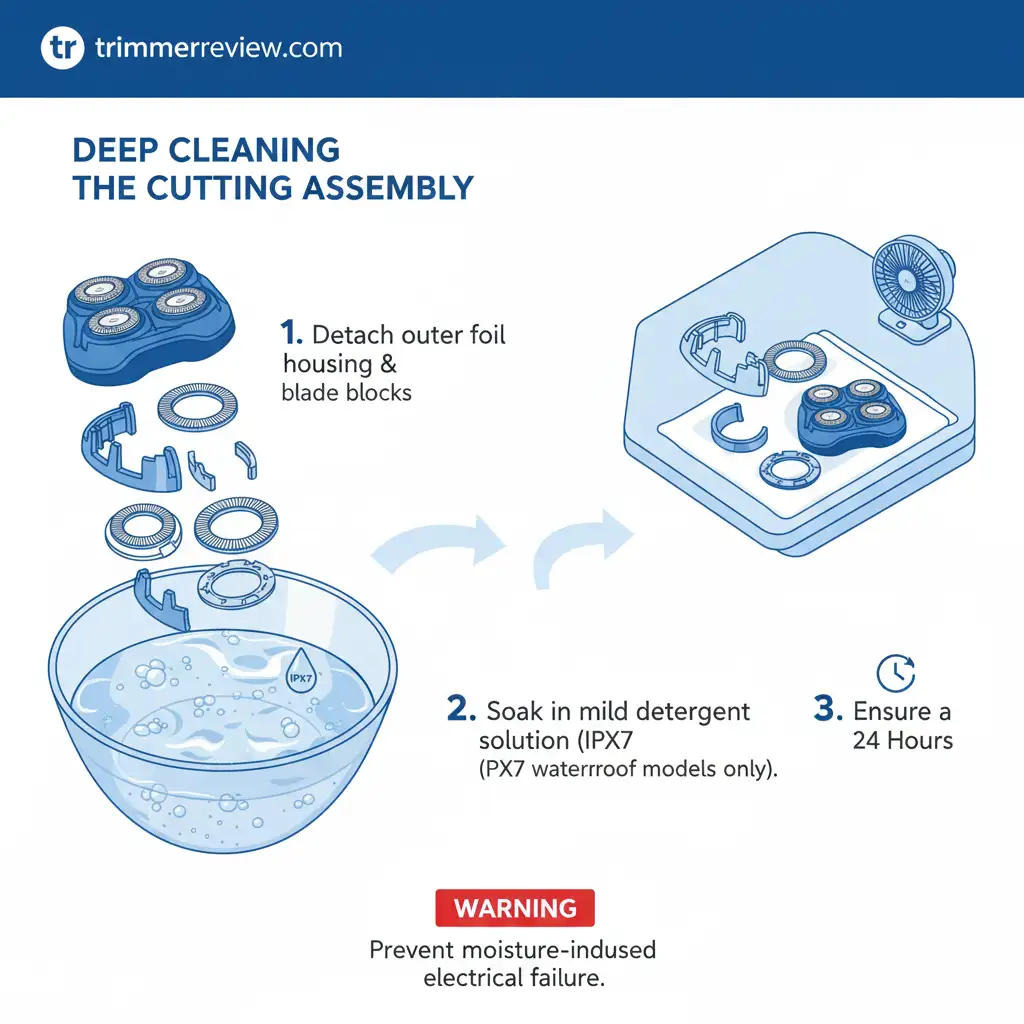
Deep Cleaning the Cutting Assembly
Detach the outer foil housing and the internal blade blocks. For devices with an IPX7 waterproof rating, a soak in a mild detergent solution is acceptable as part of the process to how to fix a Philips electric shaver at home. Ensure a complete 24-hour drying period before re-assembly to prevent moisture-induced electrical failure, which is a common technical oversight during DIY maintenance.
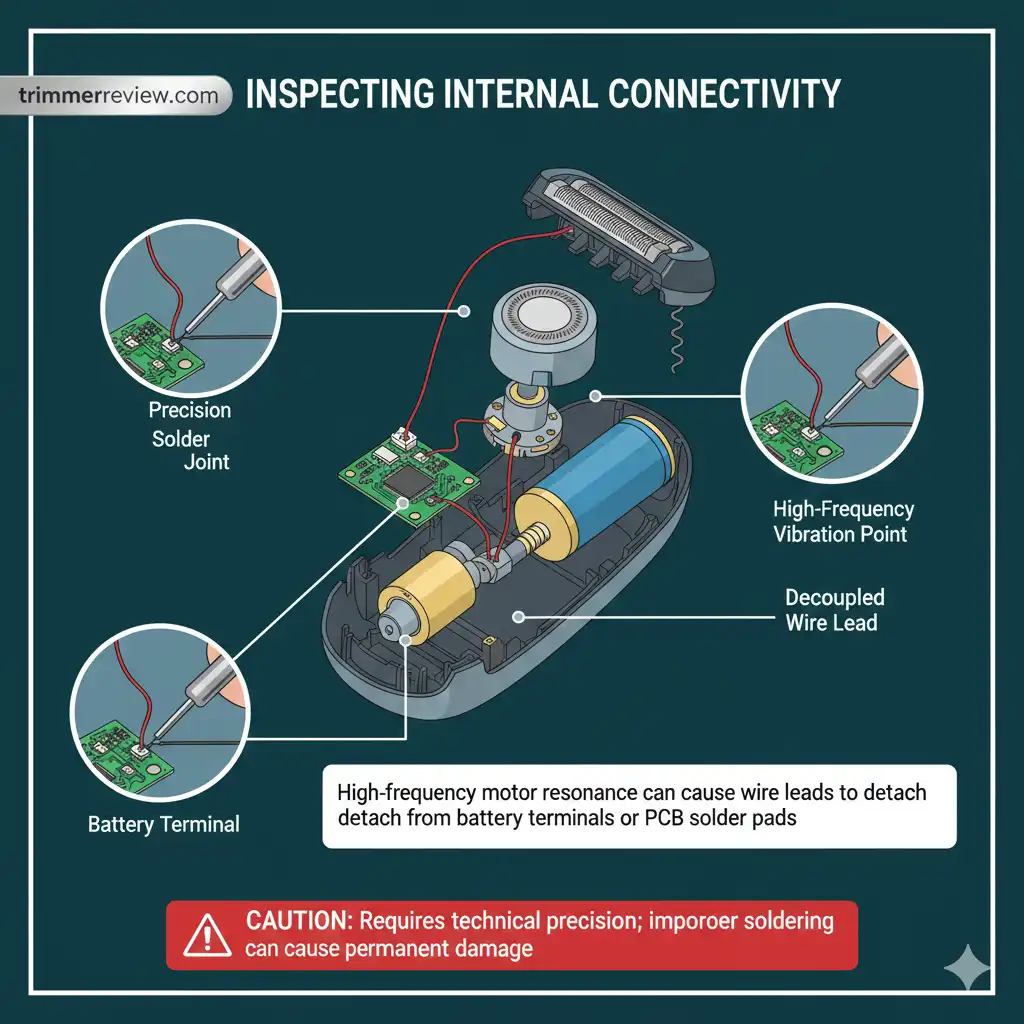
Inspecting Internal Connectivity
High-frequency motor resonance can cause wire leads to decouple from battery terminals or PCB solder pads. Accessing the internal chassis allows for visual verification of these connections. If a detachment is identified, a precision solder joint is frequently effective in restoring electrical continuity.
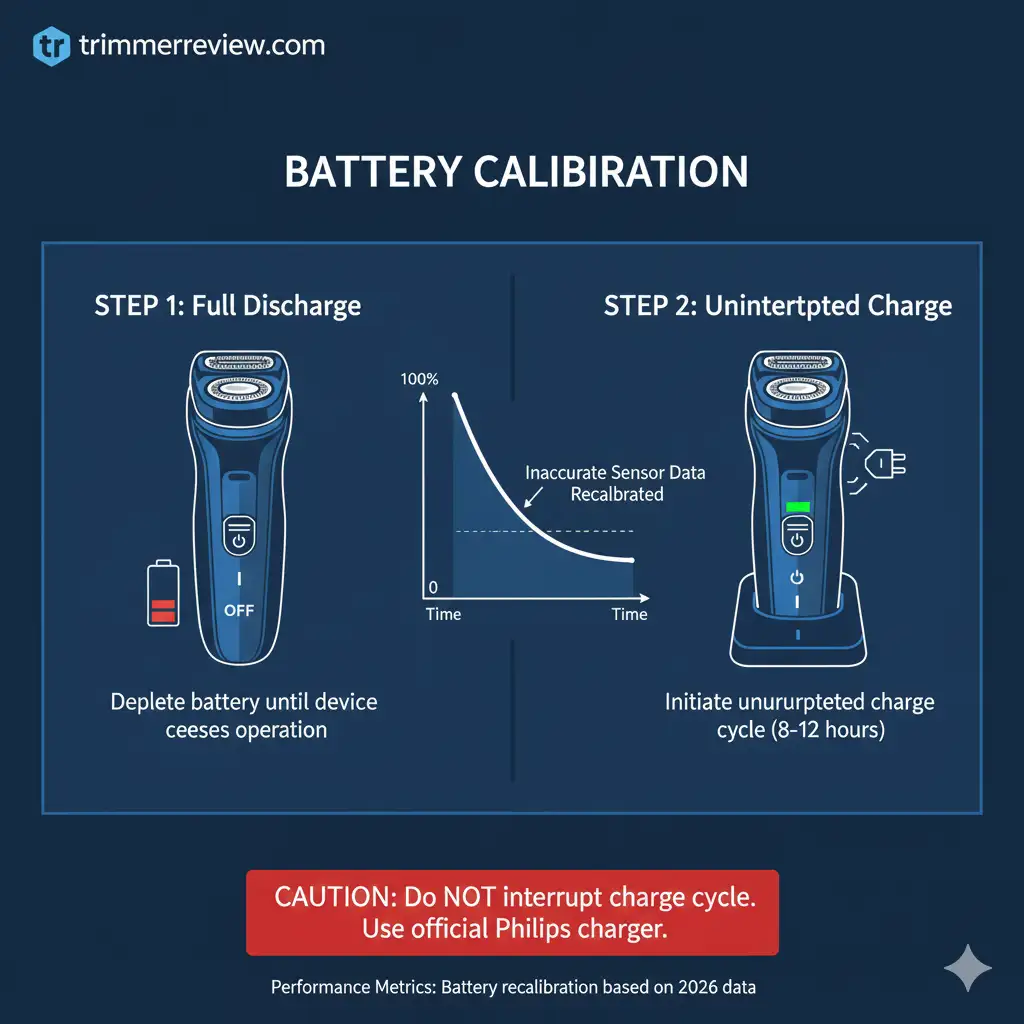
Battery Calibration
In cases of inaccurate power level reporting, a full discharge and recalibration cycle is necessary. Deplete the battery until the device ceases operation, then initiate an uninterrupted charge cycle—typically ranging from 8 to 12 hours.
Component Replacement & Refresh
In cases of inaccurate power level reporting, a full discharge and recalibration cycle is necessary. Deplete the battery until the device ceases operation, then initiate an uninterrupted charge cycle—typically ranging from 8 to 12 hours. This calibration step is a fundamental procedure when learning how to fix a Philips electric shaver at home, as it ensures the internal circuitry correctly recognizes the full electrochemical capacity of the lithium-ion cells.
- While routine cleaning addresses surface-level debris, internal mechanical malfunctions often necessitate more advanced diagnostics. For procedures involving the inspection and repair of internal components, refer to the step-by-step guide for at-home Philips shaver repairs.
- An expert technician approaches these issues by isolating the point of failure—whether it lies in the motor assembly, gear alignment, or the power transmission system. By systematically testing these components, the scope of the repair is narrowed, preventing unnecessary hardware intervention and ensuring that the restoration process remains targeted and efficient.
Maintenance & Lifecycle Table
Proactive care is the most effective way regarding how to fix a Philips electric shaver at home. by mitigating mechanical stress and preventing component failure before it occurs.
| Maintenance Task | Frequency | Technical Rationale |
|---|---|---|
| Dry Brushing | Every 2–3 uses | Prevents debris accumulation and reduces motor load |
| Blade Oiling | Once a month | Minimizes friction, thermal dissipation, and internal wear |
| Foil Inspection | Every 6 months | Identifies metal degradation to prevent skin irritation |
| Deep Sanitation | Every 3 months | Eliminates bacterial growth and removes calcified mineral deposits |
Related Guides & Expert Resources
The following guides and expert resources provide in-depth insights into how to fix a Philips electric shaver at home, as well as electric shaver maintenance, troubleshooting, and performance optimization. Designed for DIY enthusiasts and professional users alike, these references help you extend the lifespan of your Philips shaver, prevent common issues, and perform repairs safely and effectively.
- Deep Clean Philips Electric Shaver: 5 Expert Ways (2026 Guide)
- How to Fix a Philips Electric Shaver at Home in 2026: A Step-by-Step Guide
Conclusion
Mastering how to fix a Philips electric shaver at home serves as a practical approach to hardware maintenance, effectively minimizing unnecessary equipment replacement and reducing electronic waste.
Frequently Asked Questions (FAQ)
Is WD-40 suitable for lubricating an electric shaver?
No. WD-40 acts primarily as a solvent, not a lubricant. Application to shaving assemblies can degrade synthetic housing components, dissolve factory-applied protective lubricants, and cause adverse skin reactions. Always utilize industry-standard, food-safe shaver oil designed specifically for high-speed cutting elements.
If I am learning how to fix a Philips electric shaver at home, what causes an electric shaver to overheat during operation?
Thermal escalation typically stems from excessive internal friction or debris accumulation impeding the drive train. A comprehensive cleaning of the motor shaft followed by precise lubrication usually resolves this. If internal temperatures remain abnormal after service, the fault likely lies with an aging battery or deteriorating motor windings.
How should a non-functional electric shaver be discarded?
Due to the presence of lithium-ion cells, electric shavers are classified as hazardous waste and must not be placed in standard residential trash. The device should be surrendered at a certified electronics recycling facility to mitigate fire risks and ensure the professional recovery of hazardous battery materials.
What is the expected service life of a rechargeable shaver battery?
Lithium-ion cells typically retain effective capacity for 3 to 5 years, contingent upon charging discipline. Consistent deep-cycle discharging—where the battery is allowed to reach zero percent—tends to accelerate capacity degradation. When operational runtime fails to exceed five minutes, the electrochemical cycle life of the cells is exhausted. Due to the integrated nature of these components, attempting a battery replacement often compromises the factory-sealed housing, making unit replacement the more pragmatic and reliable solution.
Transparency & Fact-Checking
For full transparency and product information verification details, refer to the Disclaimer & Fact-Checking Policy.